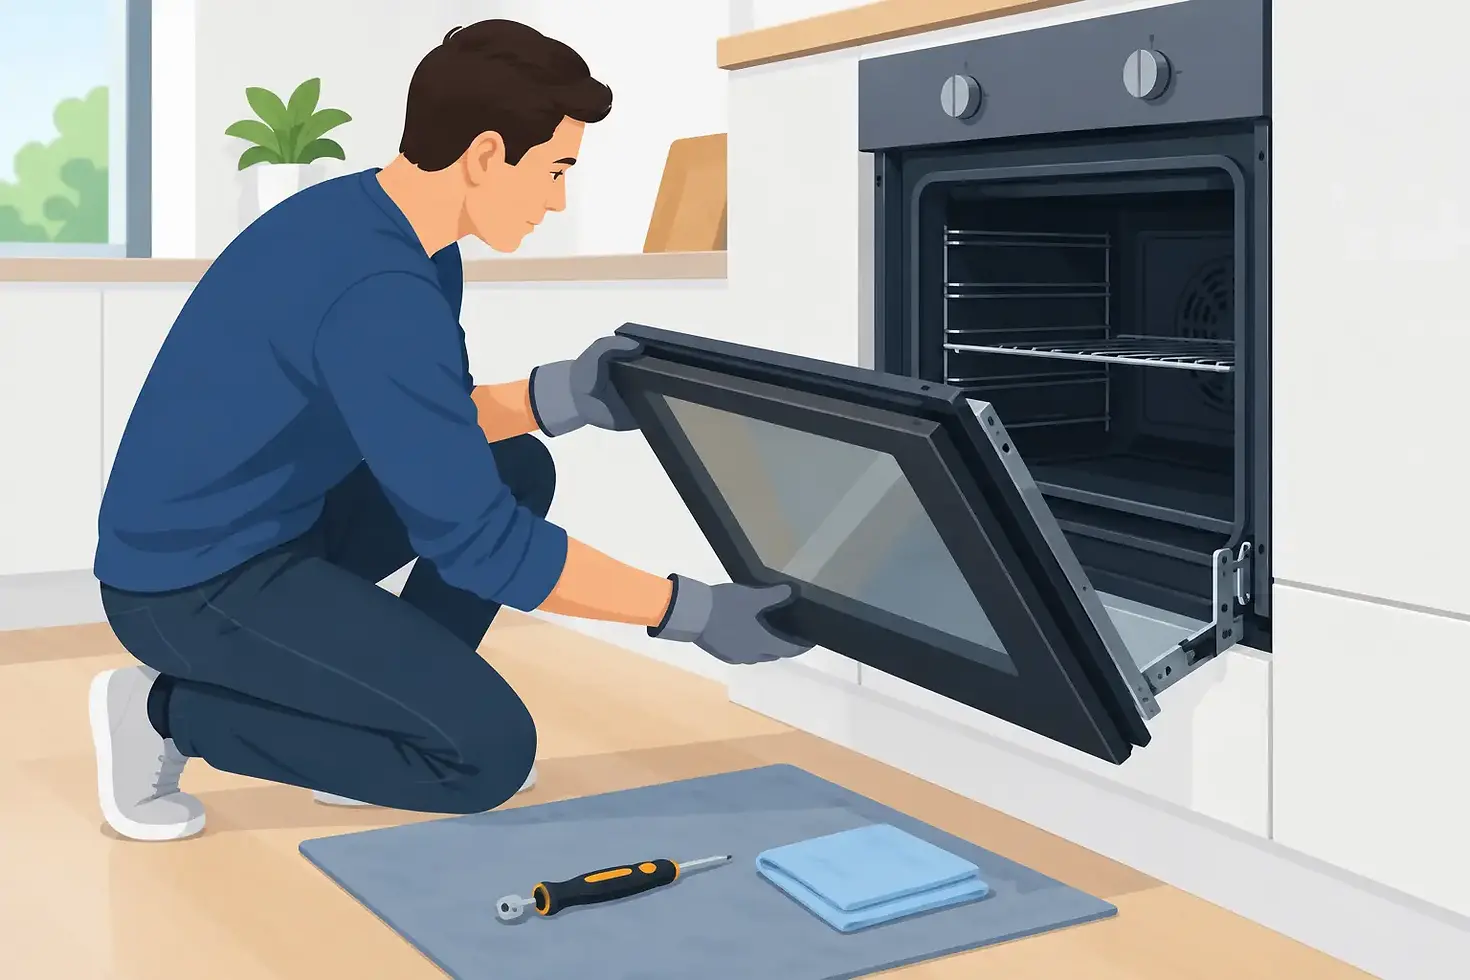
How to Remove an Oven Door Safely at Home

A grimy oven door can make an otherwise clean kitchen look neglected, especially when grease has baked onto the glass or collected between the panels. Knowing how to remove oven door components correctly can make cleaning far more effective, but it is not a job to rush. Oven doors are heavier than they look, hinges are spring-loaded, and the removal method varies considerably between makes and models.
For some ovens, lifting the door off is straightforward. For others, it involves hinge locks, retaining clips or screws that must be handled in the right order. The safest starting point is always your appliance manual. If it is unavailable, find the model number, usually located around the frame of the oven cavity or inside the door, and check the manufacturer’s instructions before attempting anything.
Before you remove an oven door
Let the oven cool completely. This sounds obvious, but door glass and metal retain heat longer than expected after cooking. Switch the oven off at the isolation switch, or unplug it if it has a plug that is safely accessible. You are not working on electrical wiring, but isolating the appliance avoids accidental activation while the door is off.
Clear a sturdy, flat surface nearby and cover it with a clean towel or blanket. This gives the door somewhere safe to rest and protects both the glass and your flooring. Avoid balancing it on a worktop edge, a chair or a draining board. The outer glass can scratch, and the door can twist if it is not properly supported.
It also helps to have a second person nearby for larger range cookers or particularly heavy doors. A standard built-in oven door may be manageable alone, but a door with multiple glass panels, cast handles or wider dimensions can be awkward to control. Steady handling matters more than speed.
How to remove an oven door safely
Most modern ovens use hinged doors that lift away once the hinges have been locked into an open position. The exact design differs, but the general process is similar.
First, open the oven door fully. Look closely at both hinge arms, near the bottom corners of the door. Many models have small metal locking levers or clips. Pull or flip these towards you, or downwards, as directed by the manufacturer. They hold the spring-loaded hinges in a safe position while the door is removed.
Once both locks are engaged, partly close the door until it reaches the removal angle. This is often around 15 to 30 degrees from closed, rather than fully shut. Hold the door firmly at each side, not by the handle alone, then lift upwards and towards you in one controlled movement. The hinge arms should slide out of their slots in the oven frame.
Place the door flat on the prepared towel with the handle facing down if the manufacturer advises it, or in the orientation specified in the manual. Do not force it if it does not lift out easily. A stuck door usually means the hinge locks are not fully engaged, the door is at the wrong angle, or the appliance uses a different fixing arrangement.
Some older ovens and certain cooker models have door hinges secured by screws or removable pins rather than locks. In those cases, removing the door may require a screwdriver and a more precise procedure. Do not remove random screws from the door frame in the hope that the door will come free. They may retain the hinge mechanism, inner glass or handle assembly, and replacing them incorrectly can affect how the door closes.
Keep clear of the hinges
Oven door hinges are under tension. Never put fingers between the hinge arms or try to push a hinge closed once the door is removed. If a hinge snaps shut unexpectedly, it can cause a painful injury or damage the oven frame.
If a hinge lock has slipped, leave the door where it is, keep hands clear and consult the appliance instructions. This is one of the occasions where stopping is the sensible option. A professional cleaner can clean a door thoroughly without turning a cleaning task into a repair issue.
Can you take the glass panels apart?
Removing the entire door is often enough to clean its exterior, inner face and the edge seals properly. Cleaning between the glass panels is more involved. Some doors have a removable top trim that releases the inner panes, while others use screws, clips or a panel arrangement that should only be dismantled in a specific sequence.
Before taking anything apart, take a clear photograph of the door edges, screws and panel positions. Glass panels can look almost identical but may have different coatings, cut-outs or orientations. Reassembling them in the wrong order can leave gaps, cause rattling or affect heat retention.
Lay each panel separately on a soft surface. Do not stack glass directly on glass, and avoid abrasive pads, blades or harsh scouring powders. These can scratch the surface or damage specialist coatings. Use a soft cloth with a suitable non-caustic cleaner, paying particular attention to the edges where grease can travel into the door.
It is worth being realistic here. If grease is heavily carbonised between the panes, if screws are seized, or if the door has integrated vents and complex clips, DIY dismantling may not be worthwhile. The time saved by removing every panel can quickly be lost if you are unsure how it goes back together.
Cleaning the door while it is off
With the door removed, you can reach areas that are difficult to clean when it is fitted: the lower corners, hinge-side edges, inner glass and the lip where residue builds up. Start by lifting loose crumbs and debris with a dry cloth. Then apply your chosen oven-cleaning product according to its label, allowing it time to soften baked-on grease before wiping it away.
Avoid flooding the door with liquid. Excess moisture can run into the handle, insulation or vent channels, and may leave streaks between the glass. Use a damp cloth rather than a soaking one, then dry each surface thoroughly before reassembly.
The same care applies to the oven frame. Wipe around the hinge slots and door seal gently, but do not pull or stretch the seal. A damaged seal can allow heat to escape, make the outside of the door hotter and reduce cooking efficiency.
For households with children or pets, product choice matters. Strong caustic cleaners can produce unpleasant fumes and can damage skin, surfaces and some door finishes if used incorrectly. Non-toxic, non-caustic and low-odour products are a more considerate option for routine cleaning, although stubborn carbon may still take patience and repeated treatment.
Refitting the oven door
To refit a lift-off door, hold it securely at both sides and line up the hinge arms with their slots in the oven frame. Slide them in fully at the same angle used for removal. Open the door completely, then return the hinge locks or clips to their original position. Close the door slowly and check that it sits level against the seal.
Do not slam it shut to test it. Instead, open and close it gently a few times. The door should move smoothly, stay aligned and seal evenly. If it catches, looks uneven or will not close properly, stop using force. Remove it again only if you are confident the hinges have been seated correctly, otherwise arrange professional help or contact the manufacturer’s service team.
Once fitted, switch the appliance back on and check the clock or display if your oven requires it to be reset after isolation. There is no need to run the oven immediately after a gentle, low-moisture clean, but make sure all components are dry first.
When professional oven door cleaning is the better choice
Removing an oven door is manageable for many people, but it depends on the appliance, its condition and how much cleaning is needed. It is often better to call in a specialist when the door glass is heavily stained between panels, hinges feel loose, parts are seized, or you are preparing a property for sale, a tenancy changeover or an inspection.
A professional service also makes sense when the oven itself needs more than a surface wipe. Shelves, racks, grill pans and removable components can hold years of grease and burnt-on residue. At Revive Oven Cleaning, detachable components are treated in a heated dip tank in a custom-built van, while the oven interior and door are carefully hand-cleaned using safe, fume-free products. Where the door design allows, the glass panels can be dismantled and cleaned before careful reassembly.
That approach avoids spending a weekend around harsh fumes or struggling with awkward components on the kitchen floor. It also leaves the appliance ready to use immediately after the appointment, which is particularly helpful for busy households, landlords and letting agents.
A clean oven door should close smoothly, show clear glass and give you confidence that no grease is being left to smoke, smell or build up further. If the hinges, glass or fittings give you any doubt, put the door down safely and choose careful help over a forced fix.


